The Ultimate DIY Guide For Pen And Pencil Holder

In this post, I’ll hold nothing back and teach you how to create a pen and pencil holder for your desk. Step by step tutorial with images.
Contents
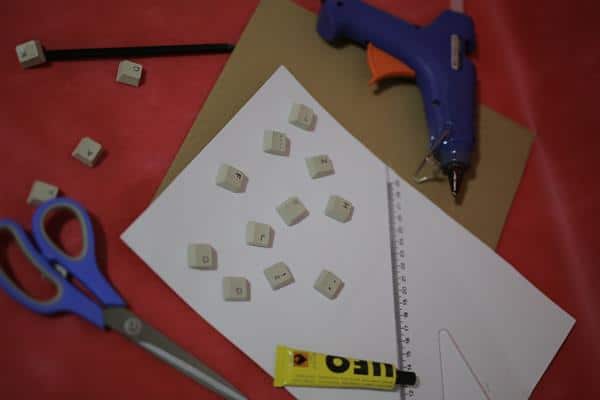
Items required for pen and pencil holder:
For this project you will need:
- An old keyboard
- Some cardboard
- White sheets
- Scissors
- Ruler
- Paper glue
- Hot glue gun
Do you have some old keyboard that you are not using any more and you were thinking of throwing it in the garbage? It is a perfect way to use it.
I’ve found one old keyboard as you can see in the picture below and with that I got a few additional steps for doing this project.

The first step you need to do is to take off all the letters and numbers of the keyboard. As you can see on the picture of my keyboard, the buttons are in two colors.
I only wanted to use same color buttons, so I took them out of the keyboard one by one and planned how big the box I wanted to be.
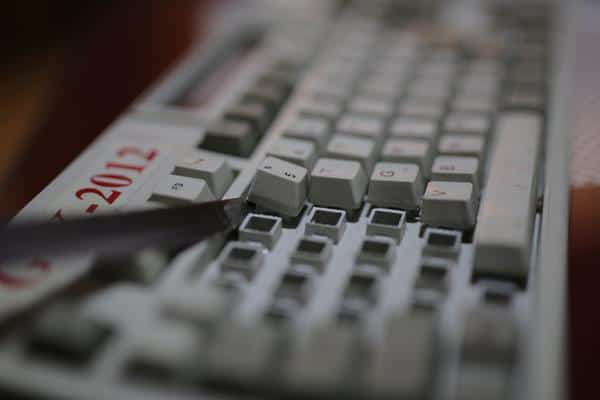
It turned out that I have around 64 buttons so decided my holder have 16 buttons on one side.
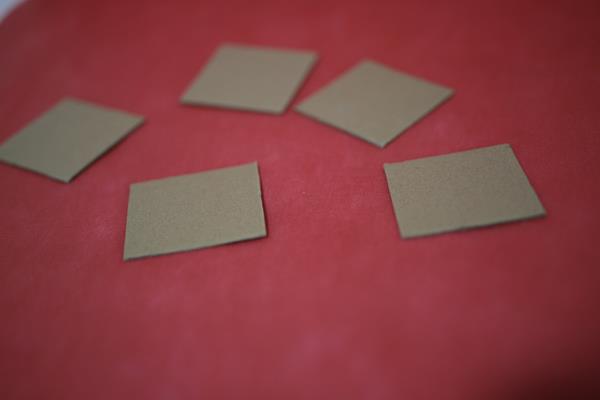
Cut the cardboard squares:
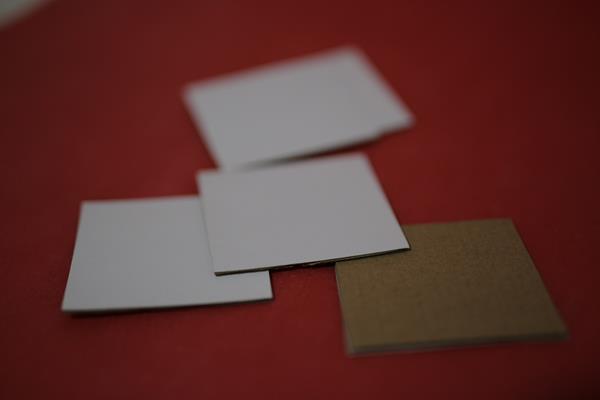
You have to measure one button and multiply its size by the number of buttons you want to use on one side. As I mentioned before, I wanted to put 16 buttons on one size. I cut five squares of 7cm by 7cm.
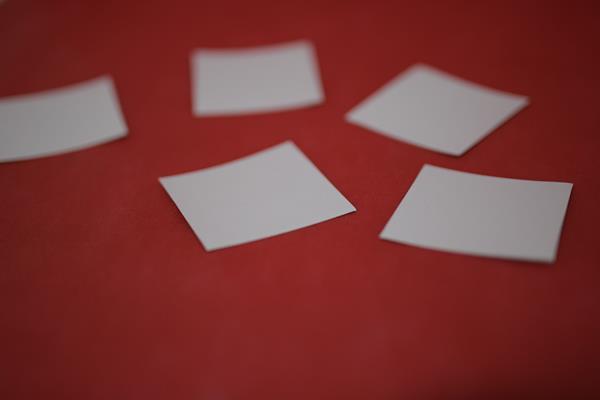
Cut the white squares:
The next thing I’ve done was to cut exactly same five squares from the white sheets.
Glue the cardboard and the white squares:
I put white squares on the cardboard squares and glue them together with paper glue. I’ve repeated the procedure for all the squares.
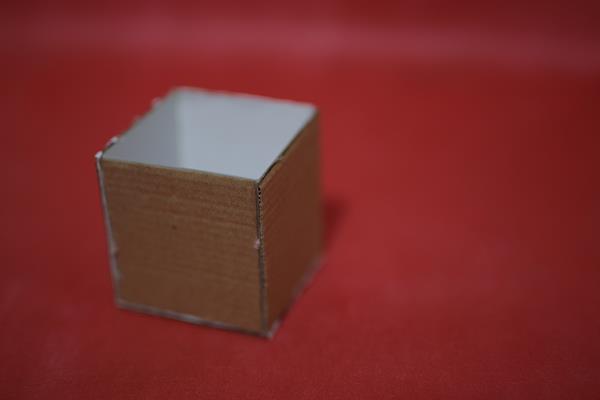
Assemble the box:
Then I started to assemble the box. I was gluing two sides together with hot glue gun putting the white side inside. When they were dry, I continued to add more sides until I was done with assembling all five sides.
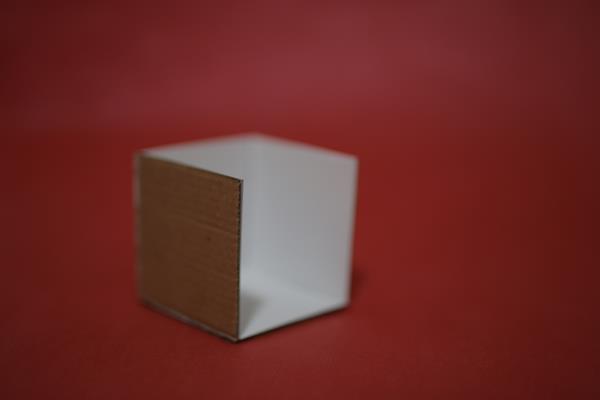
In that way when I finished the box it was white inside.
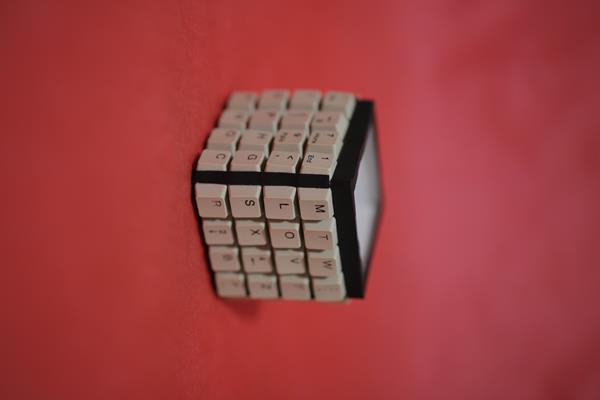
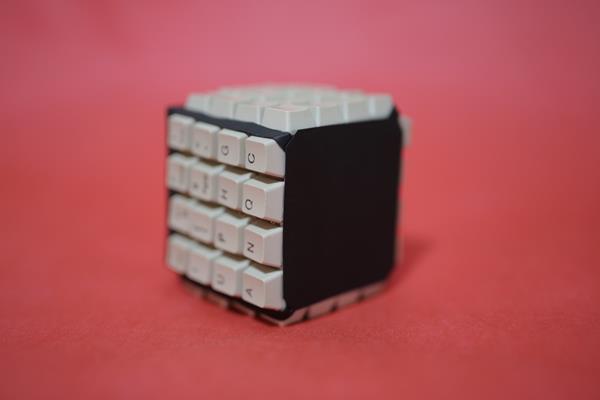
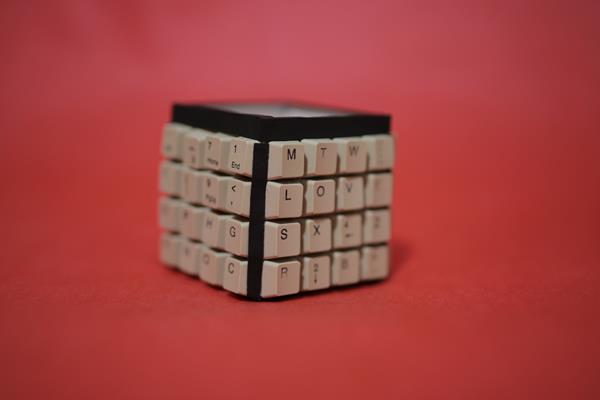
When you have your box finished, you can start adding the buttons from the keyboard with hot glue gun. First, glue two buttons on the edges of two sides and then add the buttons in the middle.
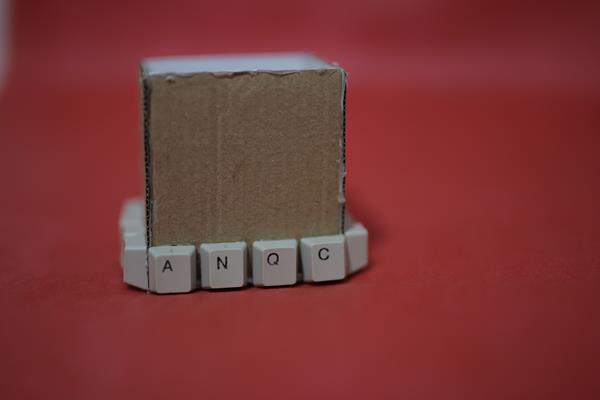
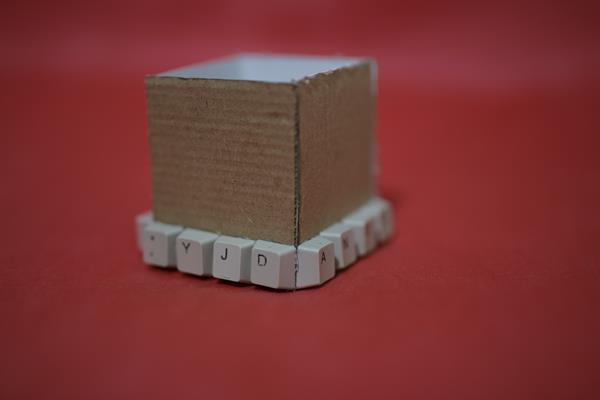
You can be creative and make some words with the letters like “LOVE,” “WEB,” “LUCK” etc.
How to deal with leftover space?
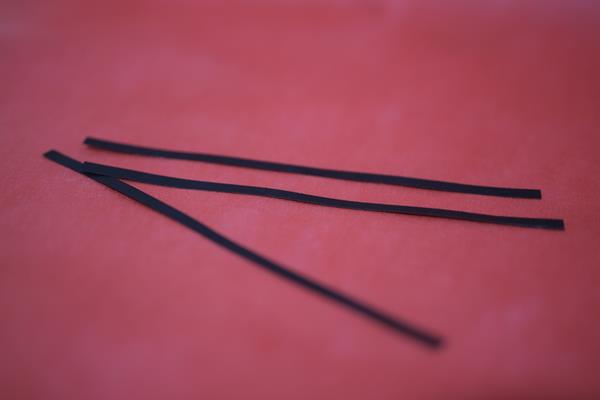
When I finished adding the buttons I had a little space left at the top of the box. If you get something like this too, you can cut it out, or you can also feel creative and do something like I did.
I cut few black strips and started wrapping them around. The result that I got was nice. I’ve also added some black strips in the corners of the box.
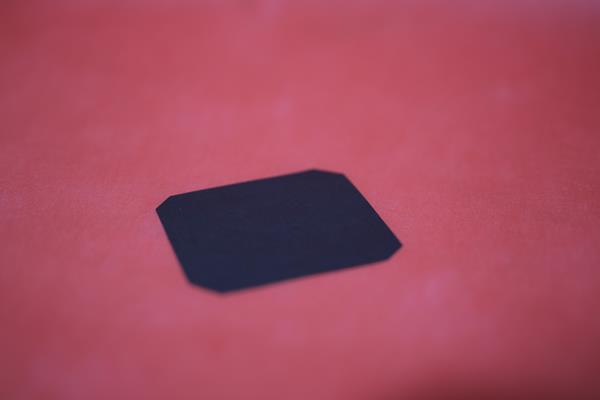
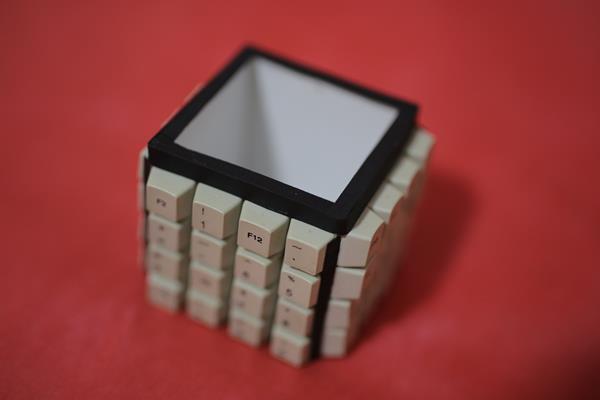
Cover the base:
The last thing to do is to cover the base. Since I was using some black color, I decided to choose also black for the base.
I cut a little bigger square than 7cm by 7 cm. In that way, I covered the cardboard and the part of the buttons where they are glued.
And your pencil holder is finished.

Some additional advice:
If you don’t have the black sheet, you can use the white you used before for the inside. You can also paint the whole box in one color.
P.S. If you have some of the newer flat black keyboards the finished result will be stunning. More ideas about pen and pencil holders.
